Today, we are going to discuss the "How to make animations in SolidWorks for beginners and how to avoid making errors.Here is a note about "The
SolidWorks has an "animation function" that is useful for presentations and other purposes to illustrate the basic operations of a design. Today, we will explain the basics of how to create such animations in the simplest way possible for beginners.
We will not cover the basics of how to start and save a motion study.
- SolidWorks Animation Basics
- How to create a SolidWorks animation
- operation
- appearance
- If you want to erase a component part (such as a workpiece) that will be lost in the process
- If you want to change the color of the model during the animation
- If you want to change the model to a wireframe or something else during the animation
- If you want to change the viewing direction during an animated action
- When you want to work with animation in any position
- Other
- Points to keep in mind while working
- If you are unable to resolve and process the red key point by any means
- Playback of animation
SolidWorks Animation Basics
Versions that can be animated
SolidWorks allows users to create animations in Premium, Professional, or Standard.
Preparation before work
1. if you want to move parts of sub-assemblies, you need to set them to "flexible".
2. if the model contains many subassemblies and errors are common, make an effort to reduce the number of parts to reduce the number of matches.
3. it is convenient to specify the range of movement of the model in the range of conformity
Keyword(s) to work with
This is an explanation of important keywords that appear in SolidWorks animations.
Time bar: Gray vertical line
Key point: The point at the beginning or end of the diamond-shaped action.
Motion study: An animation is a motion study in which the position and appearance of components change over time.
How to create a SolidWorks animation
operation
Stand-alone operation
1. move the time bar (the next action to be performed is multiplied by the number of seconds from where the bar stopped)
2. move the model you want to move (pinch on the model to move it)
3. click on the calculation icon
For example, if you set the time bar at 2 seconds and then move the model, it means that it will animate to that moving position in 2 seconds.
*If you wish to extend the time axis of the timeline, do the following
Continuous operation
1. move the time bar
2. move the model you want to move
3. click on the calculation icon
4. move the time bar further (the next move is made by multiplying the number of seconds by the position where the bar stopped)
5. move the model you want to move
6. click on the calculation icon
When moving two parts
1. move the time bar
2. move the model 1 that you want to move
4. move the model 2 that you want to move
5. click on the calculation icon
If you want to bring the model to the origin position at the end of the animation
If you want the model to return to the origin position after completing various actions, copy and paste the keypoints at the beginning ”0” seconds to the end of the timeline.
1. move the time bar and position it at the return time.
2. Copy the key point at the start ”0” second.
Right click on the time bar and paste. (It will return to the initial position.)
4. click on the calculation icon
*This key point is very confusing, but even though the shape is the same, it contains the information when the key point is placed or when the movement is made. Simply copying the keypoints may result in incorrect movement, so please work carefully to determine which keypoints to move (or copy).
appearance
If you want to erase a component part (such as a workpiece) that will be lost in the process
If you want to delete a component at the end or in the middle of an animation, do the following
1. move the time bar to the place where you want the item to disappear.
2. hide the component in model space. (A purple bar will be added to the timeline)
At this point, right-click on a keypoint and edit the time of the keypoint for more detailed settings.
*The start position of hiding is set to the beginning of the animation because transparency (hiding) starts from the beginning of the animation if this is not changed.
Setup. Follow the steps below.
3. ”Copy the key point at the start of ”0" seconds" of the model to be hidden and paste it where you want to start.
4. click on the calculation icon
If you want to change the color of the model during the animation
If you want to change the colors of the components at the end or in the middle of the animation, do the following
1. move the time bar to the location where you want to change the item's appearance.
2. change the appearance of its components in model space.
At this point, right-click on a keypoint and edit the time of the keypoint for more detailed settings.
*The start position of the appearance change is set to the beginning of the animation because the appearance change starts from the beginning of the animation if this is not changed.
Setup. Follow the steps below.
3. Copy the key point at the ”start 0 second” of the model where you want to start the color change, and paste it at the place where you want to start.
4. click on the calculation icon
If you want to change the model to a wireframe or something else during the animation
Changing a model to a wireframe in an animation can be done in the same way as hiding or changing the appearance of a model.
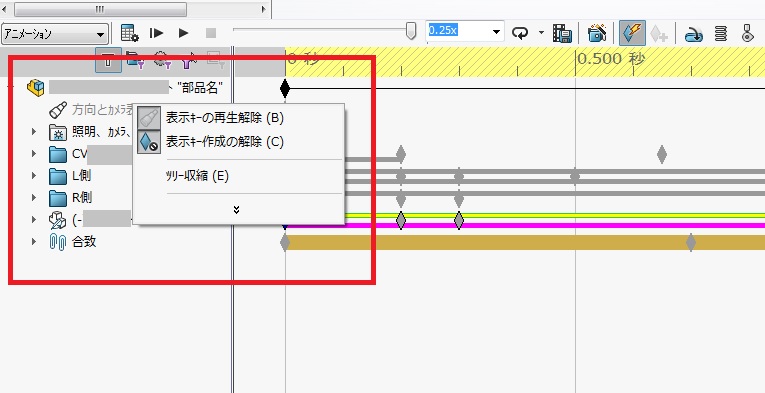
If you want to change the viewing direction during an animated action
The Animation Display key allows you to change the model view during the course of an animation.
1. right click on the direction and camera display
2. display key playback release OFF (keypoints turn black)
3. copy the key point and place it at the desired position
4. right-click on the key point to determine the display direction
5. click on the calculation icon
This allows the model view to be changed at various times during the animation.
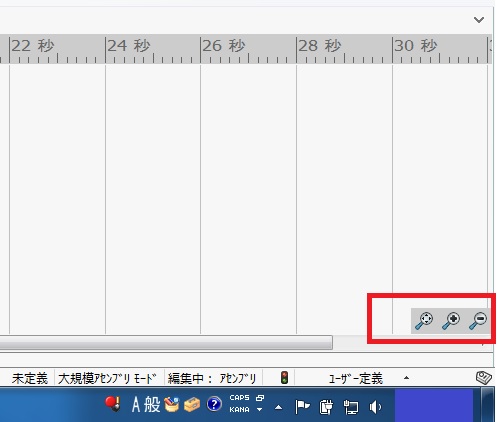
When you want to work with animation in any position
If you wish to view or play the animation at any position other than the front, plane, or side, follow the steps below to change the settings.
1. hold the playback release of the display key pressed in (as shown in the picture)
You can work in this state and record in this view as it is.
Other
To start over again
1. restore the rhombus of the motion model to its pre-operating state
When you want to put a stop between movements
When creating an animation in SolidWorks, there are times when you want the model to "pause" after it has moved. In this case, please use the following method.

1. move the time bar
2. move the model you want to move
3. click on the calculation icon
4. move the time bar further
5. move the model you want to move
6. click on the calculation icon (at this point the two actions are in continuous motion)
7. hold down the Ctrl key to create the key point to the right of the first movement (at this point there will be a blank space between the key points)
8. click on the calculation icon (this will create a move, stop, and move motion)
When you don't know what's going on anymore
Sometimes you just don't know what's going on anymore. In such cases, let's start over!
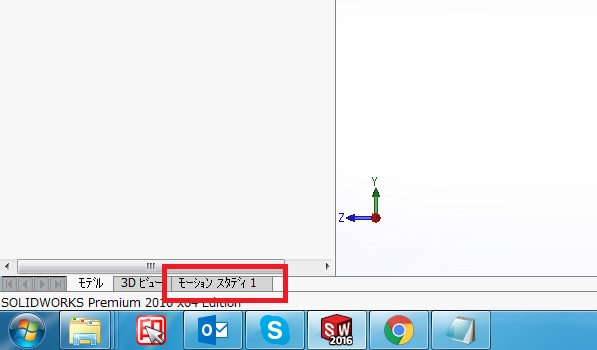
1. right-click on the motion study tab at the bottom right of the screen and select "Create New Motion Study" to create a new motion study.
2. delete old motion studies.
Points to keep in mind while working
Even if a component position is set to a keypoint instead of a time bar, the position will correspond to the time of the time bar.
If no new keypoints appear, make sure "AutoKey" is selected.
If keypoints are red, it is because the congruency relationships changed from the original definition are preventing the movement and display properties from changing,
In this case, place the time bar on the red key, right-click, select Replace Key, and redefine the key to the position where the match is acceptable.
If you are unable to resolve and process the red key point by any means
If a keypoint remains red due to an error, the model itself most likely contains the source of the error. In such cases, it is necessary to review the matching relationship or perform other time-consuming work. Therefore, it is better to prepare the original data for animation by pack-and-go or other means. In my experience, most of the key point errors are caused by "match" errors. In order to reduce the number of conformity errors, it is best to make a model with few conformities. For example, subassemblies that consist of multiple parts and move in a single motion can be "parted out," or a simple mock-up model can be used as a method.
Playback of animation
If you want to see the animation only once
If you want to play the animation only once, set "Playback Mode: Normal" to execute the animation once.
To loop the animation
If you want the animation to play in a loop, set "Play Mode: Loop Play" to run the animation in a loop.
If you want to see the animation in a reciprocal motion
If you want to play the animation in a back-and-forth motion, set "Playback Mode: Back-and-forth" to make the animation move back-and-forth (in reverse).
Changing the orientation of the model during playback
If you wish to check the model at an arbitrary position during animation playback, you can do so in the following way
1. playback
2. rotate the assembly in model space (time bar pauses)
*After a series of operations, any position is reset.
That's it.
RELATED:Solidworks